Previously we looked at building a Spring Cloud Data Flow on Kubernetes. As a follow up, we’re now looking at deploying to Google Kubernetes Engine. The great thing about Kubernetes you use exactly the same commands to manage a cluster on your laptop as on a server or cloud compute platform. Google has first class support for Kubernetes on the Google Kubernetes Engine so deploying the Primer application was very straightforward.
Download the tools
Google Kubernetes Engine has an excellent Quickstart tutorial that helps you download and configure the gcloud shell. Once you’ve downloaded the shell, run a couple of commands to point it at your GKE project:
gcloud config set project <my project id>
gcloud config set compute/zone <my zone>
I skipped the step to Create a GKE Cluster – I preferred to set this up through the GKE console so that I had more control over how the cluster and nodes were configured.
Then use gcloud to configure your kubectl to point at your GKE project. If you’ve followed along with the previous tutorial, your kubectl is currently pointing at your local Minikube instance. Do this to have your commands run against your GKE instance instead:
gcloud container clusters get-credentials <my cluster name>
Setup an ingress
In order to route traffic from the internet into the application, we’ll need to set up an ingress. This is a static IP address that points to an exposed port on your application.
gcloud compute addresses create primer-ip --global
Then add the ingress to your stack by creating a Kubernetes definition:
apiVersion: extensions/v1beta1
kind: Ingress
metadata:
  name: primer
  annotations:
    kubernetes.io/ingress.global-static-ip-name: primer-ip
  labels:
    app: primer
spec:
  backend:
    serviceName: primer-display-v1
    servicePort: 8080
This routes the newly created primer-ip ingress to our primer-display-v1 service.
Deploy!
I want to deploy the Primer application described in the previous article. One of the great things about Kubernetes is that you can use the same deployment descriptor for any environment. So we’ll use the descriptors from the previous article with just a couple of changes.
First, we need to push the locally built Docker images to the Google Docker Registry, tagged with your GCE project.
docker tag org.dontpanic.primer/number-generator:1.0.0 gcr.io/<project id>/org.dontpanic.primer/number-generator:1.0.0
docker tag org.dontpanic.primer/prime-checker:1.0.0 gcr.io/<project id>/org.dontpanic.primer/prime-checker:1.0.0
docker tag org.dontpanic.primer/display:1.0.0 gcr.io/<project id>/org.dontpanic.primer/display:1.0.0

docker push gcr.io/<project id>/org.dontpanic.primer/number-generator:1.0.0
docker push gcr.io/<project id>/org.dontpanic.primer/prime-checker:1.0.0
docker push gcr.io/<project id>/org.dontpanic.primer/display:1.0.0
Update the deployment descriptors with the tagged images and deploy!
kubectl apply -f k8s/
Last time we ran this it deployed to our local Minikube. Now we’re deploying to GKE. All being well your application will start up and be available on your ingress port.
Check status using the kubectl get pods command:

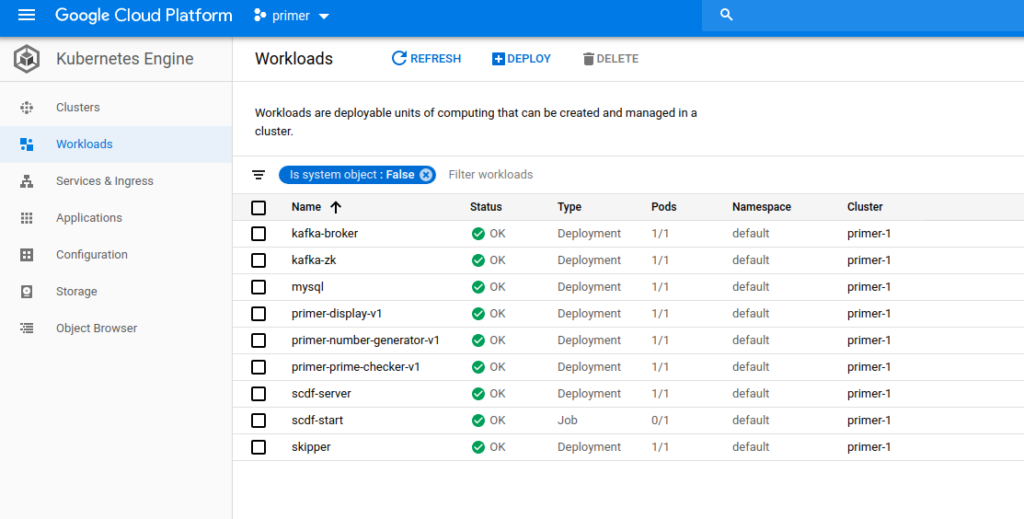
or the Google Kubernetes Engine console:

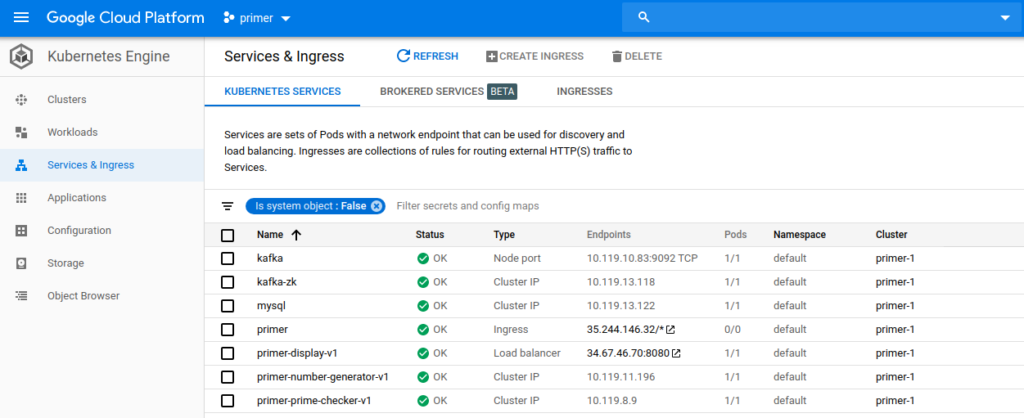
Finally, check the Ingress IP and view in a browser:

Configure a DNS
If you want this available on a named domain rather than simply an IP, add an ‘A’ record to your DNS pointing to your ingress IP.

Hey presto! That’s the app up on http://primer.dontpanicblog.co.uk/
Be First to Comment